Why Cable Installation Tools Are Important
Efficiency is critical during network cable installation. The right tools enable contractors, line installers, and repair technicians to work more quickly, precisely, and economically. In this article, you’ll learn why using well-designed cable installation devices — like punch down tools — can be so important for getting the job done right.
Contents
- What Is a Punch Down Tool?
- How to Use an Advanced Punch Down Tool
- Other Cable Installation Tools to Know
- The Next Steps After Cable Installation
- Keep Learning
What Is a Punch Down Tool?
Using the correct termination tool can increase your productivity by enabling you to install cable jacks six to eight times faster. Punch down tools increase accuracy and reliability, resulting in fewer reworks and increased client confidence.
There are three types of punch down tools used to terminate telecommunications cables: manual, impact, and multi-wire.
- • When any conductor is punched down, force is required to seat the conductor. With a manual tool, the installer uses their hand or arm to generate the force to seat the conductor.
- • The basic impact tool has a spring-loaded head. The installer compresses it, and when the spring reaches full compression, it releases automatically. The right amount of force transfers to the tool head, which then seats the conductor to make a permanent connection.
- • Advanced multi-wire tools, such as the Fluke Networks JackRapid™, terminate all pairs with a single squeeze, reducing hand fatigue.
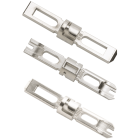
Most impact tools have interchangeable blades to fit the cabling system you’re using. The advantages of an impact tool are speed, ease of use, and consistency of termination.
How to Use an Advanced Punch Down Tool
Advanced punch down tools like the JackRapid have a built-in blade that cuts off excess wire after the wire is pushed onto the connector. They also offer an ergonomic, easy-to-use handle and a built-in bed that helps hold the jack in place. Other useful features include a replaceable blade head for use with multiple jack types and wall-friendly designs to accommodate installations close to walls.
To use an advanced punch down tool:
- Determine that the wiring scheme is in place.
- Strip the cable jacket, and then place the eight wires in their respective slots.
- Insert the jack into the tool and pull the trigger completely. Your wires should be seated and cut for a solid termination.
- Release the handle and remove the jack from the tool.
- After visually verifying the proper termination, follow the standard dress and press procedures.
The combination of faster, more reliable terminations and less rework can cut the cost of this portion of an installation job by as much as 80%.
The patented JackRapid™ tool cuts installation time and increases accuracy by seating and terminating all wires at once with a simple squeeze of the ergonomic handle.
Other Cable Installation Tools to Know
In addition to punch down tools, there are many other handheld devices that are useful for cable installation.
- • Professional scissors are important for a fast, clean, and safe cut. You’ll need to cut cable and trim excess wires on every job. Some specialty scissors feature an ergonomically designed handle that leverages your power, yielding 1.5 times the cutting force with half the effort. The special “tail” on the handle that provides added leverage also minimizes hand fatigue.
- • A cable stripper with an adjustable gauge is necessary for any cabling job. A high-quality cable stripper guarantees fast, easy removal of outer insulation from all unshielded twisted pair, shielded twisted pair, and multi-core cables. An adjustable depth gauge and a reference for checking the length to be stripped gives you repeatable results and improves the quality of your work. Imprecise alternative methods, like a pocketknife or scissors, can result in stripping more cable sheath than necessary and even damaging the cable itself.
- • Other useful tools during cable installation include crimping pliers, cable splicing knives, can wrenches for access to telephone boxes and pedestals, modular crimpers for telephone plugs, and probe pics to check for loose or damaged connections.
The Next Steps After Cable Installation
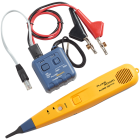
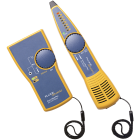
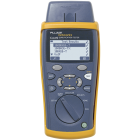
After installation, the job should be certified — or at the very least, tested — and delivered to the customer. Handheld test instruments (better known as test tools) vary tremendously in price, performance, and application. Depending on what task the test tool performs, they can be classified into broad hierarchical groups of verification, qualification, or certification.
Basic verification test tools can help you look for basic wiring faults such as miswires, opens, shorts, and split pairs after cable installation. If you want to secure a warranty backed by the cable manufacturer, however, you need to use a certification tool approved by the manufacturer. Anything else puts the sole warranty responsibility on you. Learn more about cable certification on our Cabling Certification page.

